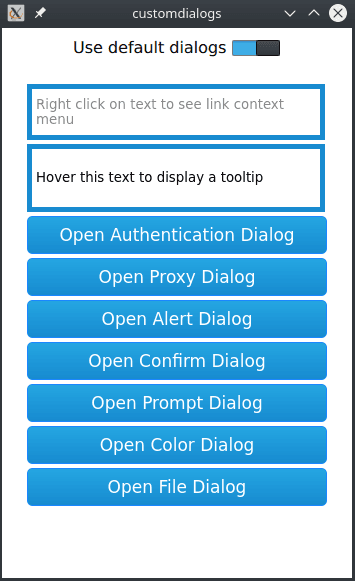
A web page might request dialogs for various purposes, such as authentication, picking colors, choosing files, and responding to JavaScript alerts, confirmation requests, and prompts.
自定义对话框 演示如何使用 WebEngine dialog request objects to implement custom dialogs for use instead of the default dialogs.
要运行范例从 Qt Creator ,打开 欢迎 模式,然后选择范例从 范例 。更多信息,拜访 构建和运行范例 .
In this example, we create a simple
index.html
page that contains buttons and text fields for triggering a context menu and the following dialogs:
As mentioned, the
index.html
file is responsible for triggering the dialogs from the side of HTML and JavaScript. Additionally, the example program starts a localhost TCP server returning the mocked HTTP responses needed to trigger proxy and HTTP authentication dialogs.
The custom dialogs are just Qt Quick Designer UI Forms without any business logic. The point here is to present the glue code that is required to display the custom dialog for a particular web engine dialog or a menu request.
在
main.cpp
, we initialize the
WebEngine
the same way as in the
WebEngine Qt Quick 最小范例
:
int main(int argc, char *argv[])
{
    QCoreApplication::setOrganizationName("QtExamples");
    QCoreApplication::setAttribute(Qt::AA_EnableHighDpiScaling);
    QtWebEngine::initialize();
    Application app(argc, argv);
    QQmlApplicationEngine engine;
    Server *server = new Server(&engine);
    engine.load(QUrl(QStringLiteral("qrc:/main.qml")));
    QTimer::singleShot(0, server, &Server::run);
    QNetworkProxy proxy;
    proxy.setType(QNetworkProxy::HttpProxy);
    proxy.setHostName("localhost");
    proxy.setPort(5555);
    QNetworkProxy::setApplicationProxy(proxy);
    return app.exec();
}
In addition, we set up a proxy and a TCP server to be able to simulate proxy and HTTP authetication requests.
在
main.qml
, we create a top level window, which contains a
StackView
with a SwitchButton and a
WebView
:
import QtQuick.Window 2.0
Window {
    width: 350
    height: 550
    visible: true
    Controls.StackView {
        id: stackView
        anchors.fill: parent
        focus: true
        initialItem: Item {
            id: main
            width: parent.width
            height: parent.height
            ColumnLayout {
                anchors.fill: parent
                SwitchButton {
                    id: switcher
                    Layout.fillWidth: true
                }
                WebView {
                    id: webView
                    useDefaultDialogs: switcher.checked
                    Layout.fillWidth: true
                    Layout.fillHeight: true
                }
            }
        }
        function closeForm()
        {
            pop(main);
        }
        function openForm(form)
        {
            push(form);
            currentItem.closeForm.connect(closeForm);
        }
    }
    Component.onCompleted: {
        webView.openForm.connect(stackView.openForm);
    }
}
In this example, we implement the handling of the following web engine requests:
ContextMenuRequest
is a request object that is passed as a parameter of the
WebEngineView::contextMenuRequested
signal. We use the
onContextMenuRequested
signal handler to handle requests for
#openMenu
URL links:
WebEngineView {
    ...
    onContextMenuRequested: function(request) {
        // we only show menu for links with #openMenu
        if (!request.linkUrl.toString().endsWith("#openMenu")) {
            request.accepted = true;
            return;
        }
        // return early to show default menu
        if (useDefaultDialogs)
            return;
        request.accepted = true;
        openForm({item: Qt.resolvedUrl("forms/Menu.qml"),
                     properties: {"request": request}});
    }
    ...
}
The first text field from the top on our page triggers the request. Next, we check whether we should use the default menu. If not, we accept the request and switch the view to show the
MenuForm
:
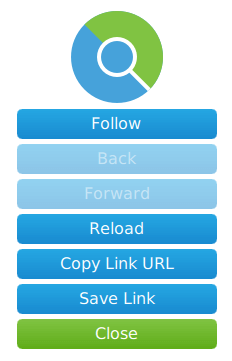
MenuForm {
    property QtObject request
    signal closeForm()
    followLink.onClicked: closeForm()
    back.onClicked: closeForm()
    forward.onClicked: closeForm()
    reload.onClicked: closeForm()
    copyLinkUrl.onClicked: closeForm()
    saveLink.onClicked: closeForm()
    close.onClicked: closeForm()
    Component.onCompleted: {
        back.btnEnable = false;
        forward.btnEnable = false;
    }
}
To keep things simple, we do not provide any logic on component completion, and we simply close the form on any action.
TooltipRequest
is a request object that is passed as a parameter of the
WebEngineView::tooltipRequested
signal. We use the
onTooltipRequested
signal handler to handle requests for custom tooltip menus at specific positions:
WebEngineView {
    ...
    onTooltipRequested: function(request) {
        if (useDefaultDialogs)
            return;
        if (request.type == TooltipRequest.Show) {
            tooltip.visible = true;
            tooltip.x = request.x;
            tooltip.y = request.y;
            tooltip.text = request.text;
        } else {
            tooltip.visible = false;
        }
        request.accepted = true;
    }
    ...
}
The second text field from the top on our page triggers the request. Next, we check whether we should use the default menu. If not, we accept the request and show a custom QML element as tooltip:

    Rectangle {
        id: tooltip
        width: 200
        height: 30
        z: 50
        visible: false
        color: "gray"
        border.color: "black"
        border.width: 2
        radius: 3
        property string text: ""
        Text {
            x: 0
            y: 0
            color: "#ffffff"
            text: parent.text
            font.pointSize: 12
            anchors.horizontalCenter: parent.horizontalCenter
            anchors.verticalCenter: parent.verticalCenter
            font.bold: false
        }

AuthenticationDialogRequest is a request object that is passed as a parameter of the WebEngineView::authenticationDialogRequested signal:
WebEngineView {
    ...
    onAuthenticationDialogRequested: function(request) {
        if (useDefaultDialogs)
            return;
        request.accepted = true;
        openForm({item: Qt.resolvedUrl("forms/Authentication.qml"),
                     properties: {"request": request}});
    }
    ...
}
使用
onAuthenticationDialogRequested
signal handler to check whether we should use the default authentication dialog. If not, we accept the request and switch the view to show the
AuthenticationForm
:
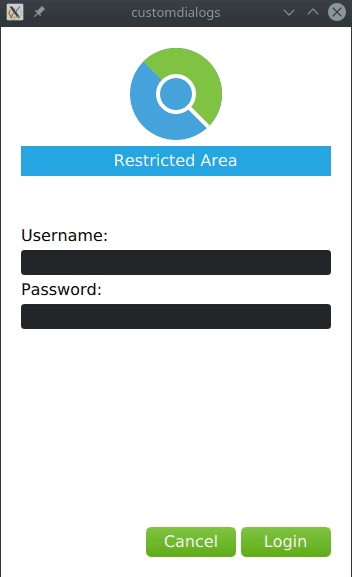
AuthenticationForm {
    property QtObject request
    signal closeForm()
    cancelButton.onClicked: {
        request.dialogReject();
        closeForm();
    }
    loginButton.onClicked: {
        request.dialogReject();
        closeForm();
    }
    Component.onCompleted: {
        switch (request.type) {
        case  AuthenticationDialogRequest.AuthenticationTypeHTTP:
            console.log("HTTP Authentication Required. Host says: " + request.realm);
            break;
        case  AuthenticationDialogRequest.AuthenticationTypeProxy:
            console.log("Proxy Authentication Required for: " + request.proxyHost);
            break;
        }
    }
}
On component completion, we log the request type. The user can fill in the credentials and click
Login
. We provide
onClicked
handlers to accept or reject the authentication dialog. The TCP server on localhost does not handle real authentication, and therefore we call
rejectDialog()
而不是
acceptDialog()
also for the login button
clicked
信号。
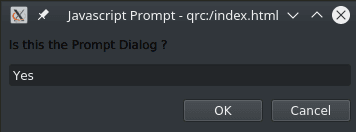
JavaScriptDialogRequest is a request object that is passed as a parameter of the WebEngineView::javaScriptDialogRequested signal:
WebEngineView {
    ...
    onJavaScriptDialogRequested: function(request) {
        if (useDefaultDialogs)
            return;
        request.accepted = true;
        openForm({item: Qt.resolvedUrl("forms/JavaScript.qml"),
                     properties: {"request": request}});
    }
    ...
}
使用
onJavaScriptDialogRequested
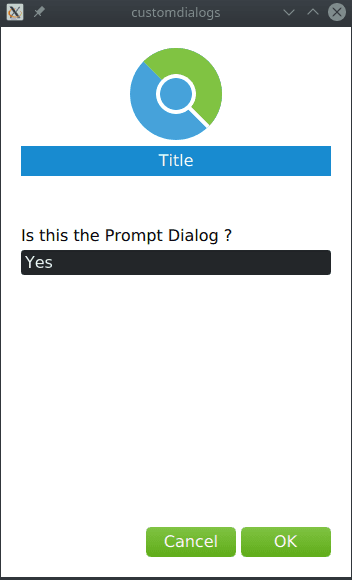
signal handler to check whether we should use the default JavaScript dialog. If not, we accept the request and switch the view to show the
JavaScriptForm
:
JavaScriptForm {
    property QtObject request
    signal closeForm()
    cancelButton.onClicked: {
        request.dialogReject();
        closeForm();
    }
    okButton.onClicked: {
        request.dialogAccept(prompt.text);
        closeForm();
    }
    Component.onCompleted: {
        switch (request.type) {
        case JavaScriptDialogRequest.DialogTypeAlert:
            cancelButton.visible = false;
            title = qsTr("Alert");
            message = request.message;
            prompt.text = "";
            prompt.visible = false;
            break;
        case JavaScriptDialogRequest.DialogTypeConfirm:
            title = qsTr("Confirm");
            message = request.message;
            prompt.text = "";
            prompt.visible = false;
            break;
        case JavaScriptDialogRequest.DialogTypePrompt:
            title = qsTr("Prompt");
            message = request.message;
            prompt.text = request.defaultText;
            prompt.visible = true;
            break;
        }
    }
}
On component completion, we customize the form based on the request type. For a JavaScript prompt dialog we use
dialogAccept()
采用
prompt.text
自变量。
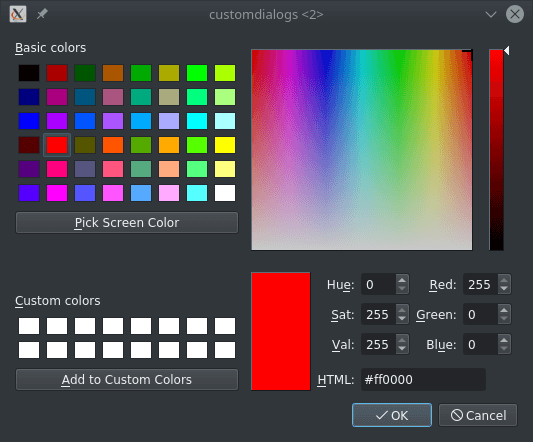
ColorDialogRequest is a request object that is passed as a parameter of the WebEngineView::colorDialogRequested signal:
WebEngineView {
    ...
    onColorDialogRequested: function(request) {
        if (useDefaultDialogs)
            return;
        request.accepted = true;
        openForm({item: Qt.resolvedUrl("forms/ColorPicker.qml"),
                     properties: {"request": request}});
    }
    ...
}
使用
onColorDialogRequested
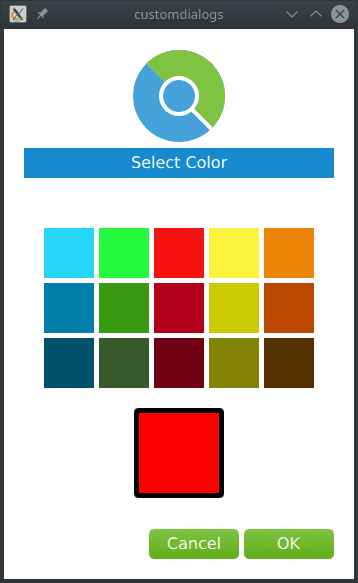
signal handler to check whether we should use the default color picker dialog. If not, we accept the request and switch the view to show the
ColorPickerForm
:
ColorPickerForm {
    property QtObject request
    signal closeForm()
    okButton.onClicked: {
        request.dialogAccept(colorPicker.color);
        closeForm();
    }
    cancelButton.onClicked: {
        request.dialogReject();
        closeForm();
    }
    function createCallback(color) {
        return function() { colorPicker.color = color };
    }
    Component.onCompleted:{
        for (var i = 0; i < grid.children.length; i++) {
            var cell = grid.children[i];
            cell.clicked.connect(createCallback(cell.color));
        }
        colorPicker.color = request.color;
    }
}
On component completion, we create callbacks for all the color cells. When the user selects the color and clicks
OK
, we pass the selected color to the
dialogAccept()
方法。
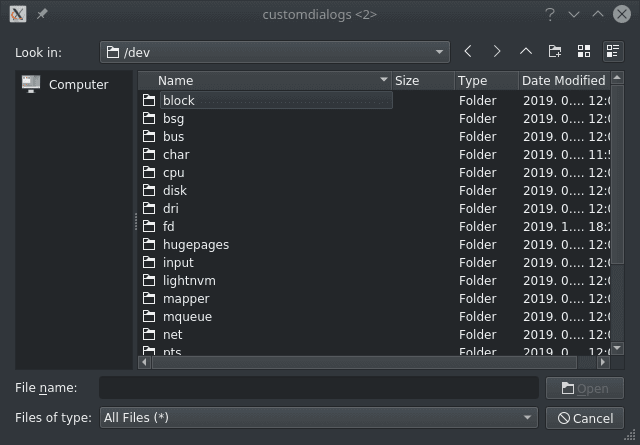
FileDialogRequest is a request object that is passed as a parameter of the WebEngineView::fileDialogRequested signal:
WebEngineView {
    ...
    onFileDialogRequested: function(request) {
        if (useDefaultDialogs)
            return;
        request.accepted = true;
        openForm({item: Qt.resolvedUrl("forms/FilePicker.qml"),
                     properties: {"request": request}});
    }
}
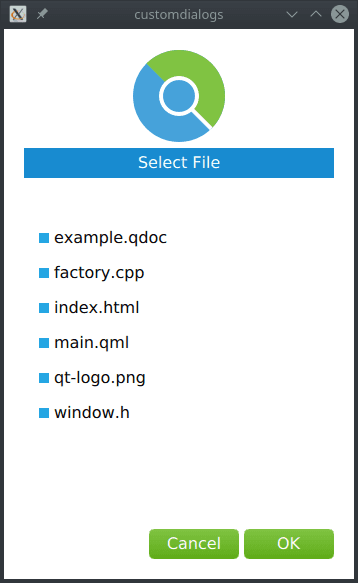
使用
onFileDialogRequested
signal handler to check whether we should use the default color picker dialog. If not, we accept the request and switch the view to show the
FilePickerForm
:
FilePickerForm {
    property QtObject request
    property string selectedFile
    signal closeForm()
    cancelButton.onClicked: {
        request.dialogReject();
        closeForm();
    }
    okButton.onClicked: {
        request.dialogAccept('/' + selectedFile);
        closeForm();
    }
    function createCallback(fileIndex) {
        return function() {
            for (var i = 0; i < files.children.length; i++) {
                var file = files.children[i];
                if (i === fileIndex) {
                    selectedFile = file.text;
                    file.selected = true;
                } else {
                    file.selected = false;
                }
            }
        }
    }
    Component.onCompleted: {
        selectedFile = request.defaultFileName;
        for (var i = 0; i < files.children.length; i++) {
            var file = files.children[i];
            file.clicked.connect(createCallback(i));
            if (file.text === selectedFile)
                file.selected = true;
        }
    }
On component completion, we create callbacks for selecting files. When the user selects a file and clicks
OK
, we pass the selected file to the
dialogAccept
方法。