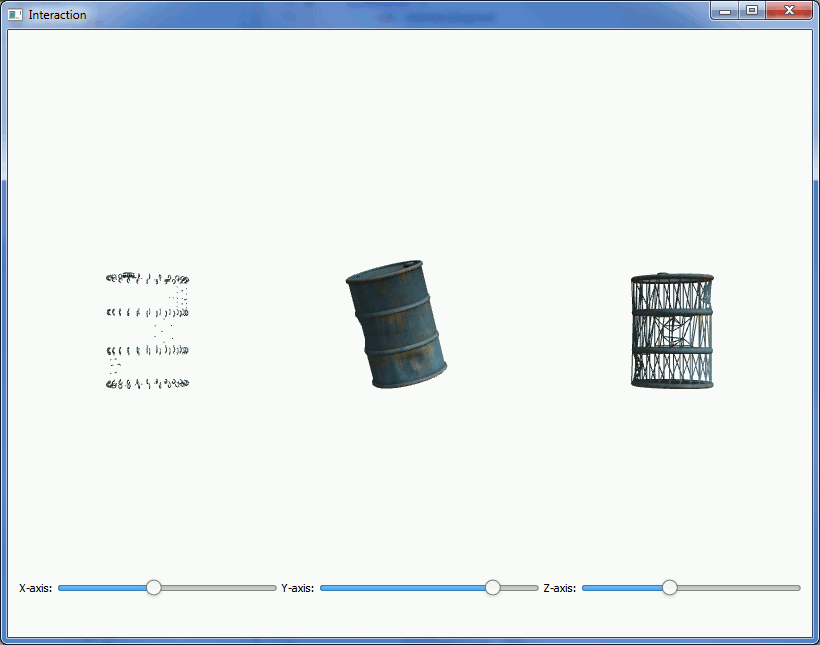
The Interaction Example concentrates on the interaction between Qt Quick Controls and the objects displayed in Canvas3D . This also demonstrates drawing the same object in three different ways.

First, we need to import Qt Quick Controls and Layouts:
import QtQuick.Controls 1.0
import QtQuick.Layouts 1.0
Then, we add a RowLayout to the main component to easily add the controls side-by-side:
RowLayout {
    id: controlLayout
    spacing: 5
    x: 12
    y: parent.height - 100
    width: parent.width - (2 * x)
    height: 100
    visible: true
And then we add three sliders to the layout. Here's the one for controlling x-axis rotation:
Slider {
    id: xSlider
    Layout.alignment: Qt.AlignLeft
    Layout.fillWidth: true
    minimumValue: 0;
    maximumValue: 360;
    onValueChanged: canvas3d.xRotSlider = value;
}
First we need to define some properties in the Canvas3D for the rotations:
property double xRotSlider: 0
property double yRotSlider: 0
property double zRotSlider: 0
The
onValueChanged
signal handlers of the
Slider
components are connected to the above properties. Here's the connection in x-rotation slider as an example:
onValueChanged: canvas3d.xRotSlider = value;
Then, on the JavaScript side, we just use the Canvas3D properties directly when setting the modelview matrix rotations:
mvMatrix = mat4.rotate(mvMatrix, mvMatrix, degToRad(canvas.xRotSlider), [1, 0, 0]);
mvMatrix = mat4.rotate(mvMatrix, mvMatrix, degToRad(canvas.yRotSlider), [0, 1, 0]);
mvMatrix = mat4.rotate(mvMatrix, mvMatrix, degToRad(canvas.zRotSlider), [0, 0, 1]);
The actual drawing is no different from any situation where the same object is drawn multiple times. Only in this case we use a different drawing mode for each:
gl.drawElements(gl.TRIANGLES, theModel.count, gl.UNSIGNED_SHORT, 0);
...
gl.drawElements(gl.POINTS, theModel.count, gl.UNSIGNED_SHORT, 0);
...
gl.drawElements(gl.LINES, theModel.count, gl.UNSIGNED_SHORT, 0);
文件: