演示如何在 Qt Quick 3D 中一起渲染 2D 和 3D 对象。
HelloCube demonstrates how to render a 3D cube with 2D items in Qt Quick 3D.
我们设置整个场景在 main.qml 文件。
为能够使用类型在 QtQuick3D 模块,必须 import 它:
import QtQuick3D 1.15
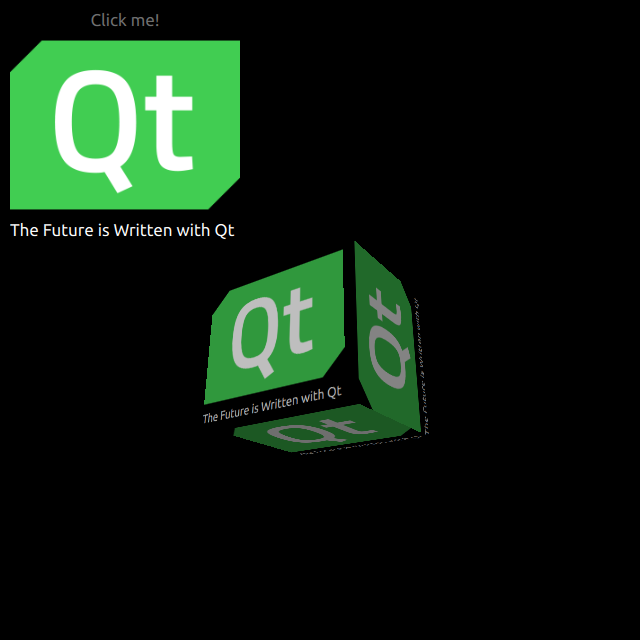
定义简单 QtQuick Items with an Image and a Text on a Rectangle.
Image {
    anchors.fill: parent
    source: "qt_logo.png"
}
Text {
    id: text
    anchors.bottom: parent.bottom
    anchors.left: parent.left
    color: "white"
    font.pixelSize: 17
    text: qsTr("The Future is Written with Qt")
}
This simple rectangle has two animations for flipping vertically.
transform: Rotation {
    id: rotation
    origin.x: qt_logo.width / 2
    origin.y: qt_logo.height / 2
    axis { x: 1; y: 0; z: 0 }
}
PropertyAnimation {
    id: flip1
    target: rotation
    property: "angle"
    duration: 600
    to: 180
    from: 0
}
PropertyAnimation {
    id: flip2
    target: rotation
    property: "angle"
    duration: 600
    to: 360
    from: 180
}
Drawing a cube is very simple. After defining a Camera ,和 Light , we make a cube with a built-in Model . In this example, we render previous 2D Rectangle on this cube surface as a diffuse Texture . Back to the properties of the Rectangle, you can see layer.enabled. This property makes the 2D item as a offscreen surface.
layer.enabled: true
id: cube
visible: true
position: Qt.vector3d(0, 0, 0)
source: "#Cube"
materials: [ DefaultMaterial {
        diffuseMap: Texture {
            id: texture
            sourceItem: qt_logo
        }
    }
]
eulerRotation.y: 90
文件:
图像: