简单 demonstrates how to render a scene in Qt Quick 3D.
我们设置整个场景在 main.qml 文件。
为能够使用类型在 QtQuick3D 模块,必须 import 它:
import QtQuick3D 1.15
First of all, we define the environment of our simple scene. We just clear the background color with 'skyblue' in this example.
environment: SceneEnvironment {
    clearColor: "skyblue"
    backgroundMode: SceneEnvironment.Color
}
And then, we define a camera which represents the viewport of the rendered scene. In this example, we use PerspectiveCamera which shows perspective viewport in a general 3D scene. Because we want to define some objects around origin, we move this camera to the rear position and rotate slightly.
PerspectiveCamera {
    position: Qt.vector3d(0, 200, 300)
    eulerRotation.x: -30
}
For the objects in the scene to be rendered correctly we need to add a light source, in this example we'll be using a DirectionalLight
DirectionalLight {
    eulerRotation.x: -30
    eulerRotation.y: -70
}
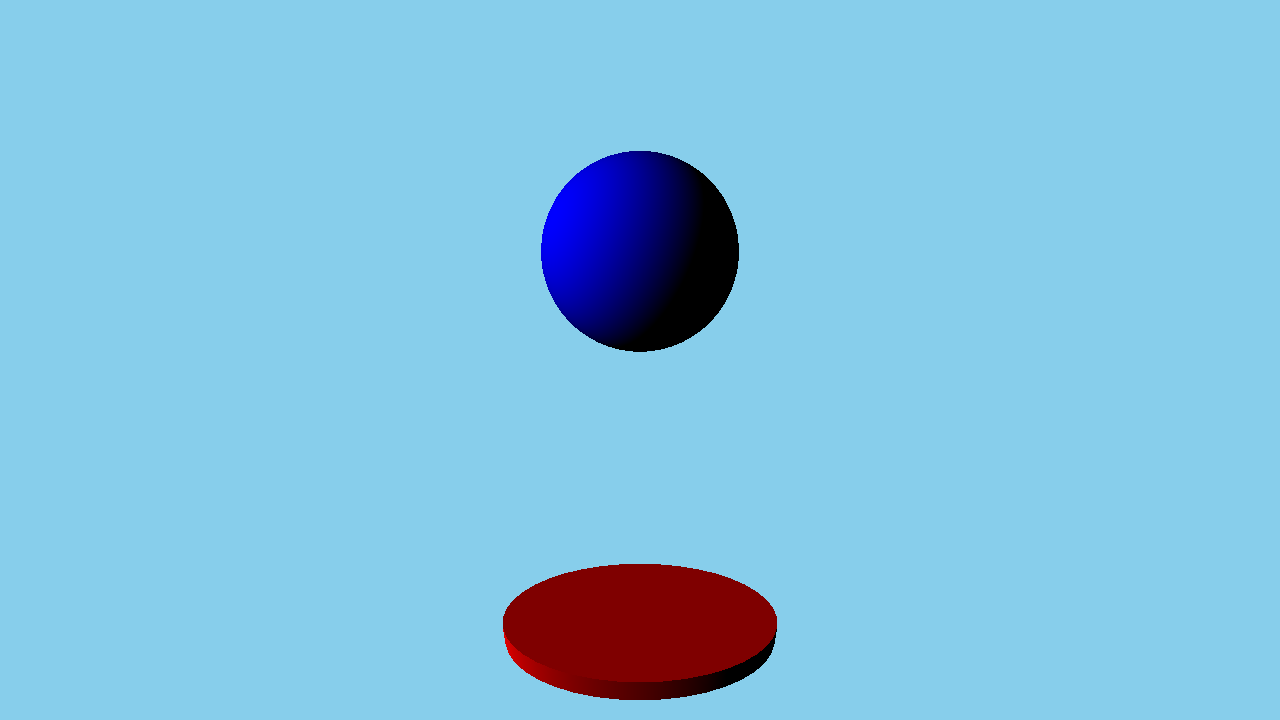
Now, we draw some built-in objects. In this example, we draw a red cylinder and a blue sphere using Model . However, just drawing objects is too simple, so we make a round plate with the red cylinder and add bouncing animation for the sphere.
Model {
    position: Qt.vector3d(0, -200, 0)
    source: "#Cylinder"
    scale: Qt.vector3d(2, 0.2, 1)
    materials: [ DefaultMaterial {
            diffuseColor: "red"
        }
    ]
}
Model {
    position: Qt.vector3d(0, 150, 0)
    source: "#Sphere"
    materials: [ DefaultMaterial {
            diffuseColor: "blue"
        }
    ]
    SequentialAnimation on y {
        loops: Animation.Infinite
        NumberAnimation {
            duration: 3000
            to: -150
            from: 150
            easing.type:Easing.InQuad
        }
        NumberAnimation {
            duration: 3000
            to: 150
            from: -150
            easing.type:Easing.OutQuad
        }
    }
}
文件: