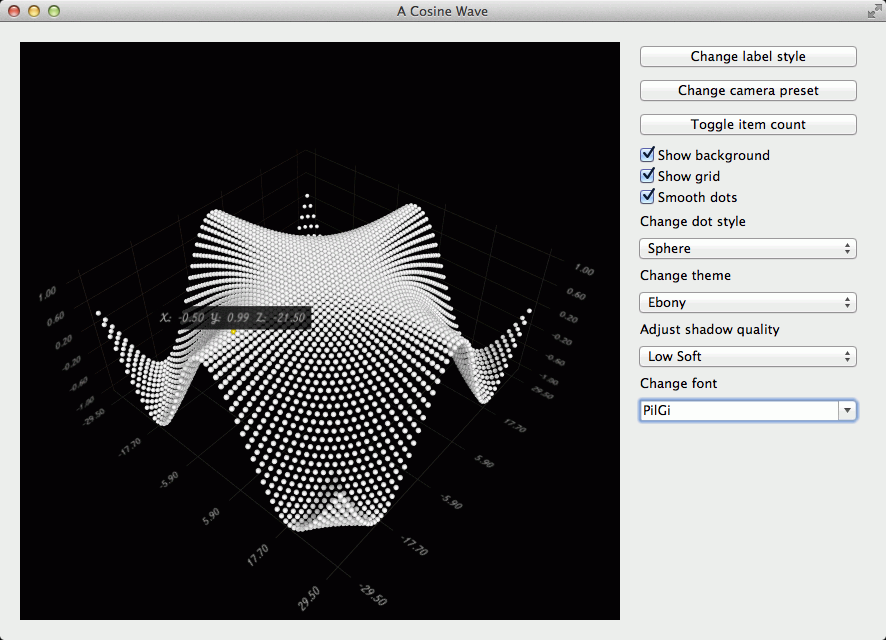
The scatter example shows how to make a simple 3D scatter graph using Q3DScatter and combining the use of widgets for adjusting several adjustable qualities. The example shows how to:
For instructions about how to interact with the graph, see this page .
要运行范例从 Qt Creator ,打开 欢迎 模式,然后选择范例从 范例 。更多信息,拜访 构建和运行范例 .
First, in main.cpp, we create a QApplication ,实例化 Q3DScatter , and a window container for it:
QApplication app(argc, argv);
Q3DScatter *graph = new Q3DScatter();
QWidget *container = QWidget::createWindowContainer(graph);
The call to QWidget::createWindowContainer is required, as all data visualization graph classes ( Q3DBars , Q3DScatter ,和 Q3DSurface ) 继承 QWindow . Any class inheriting QWindow cannot be used as a widget any other way.
Then we'll create horizontal and vertical layouts. We'll add the graph and the vertical layout into the horizontal one:
QWidget *widget = new QWidget;
QHBoxLayout *hLayout = new QHBoxLayout(widget);
QVBoxLayout *vLayout = new QVBoxLayout();
hLayout->addWidget(container, 1);
hLayout->addLayout(vLayout);
We're not using the vertical layout for anything yet, but we'll get back to it in Using widgets to control the graph
Next, let's create another class to handle the data addition and other interaction with the graph. Let's call it
ScatterDataModifier
(见
Setting up the graph
and
Adding data to the graph
了解细节):
ScatterDataModifier *modifier = new ScatterDataModifier(graph);
The application main is done. We can show the graph and start the event loop:
widget->show();
return app.exec();
Let's set up some visual qualities for the graph in the constructor of the
ScatterDataModifier
class we instantiated in the application main:
m_graph->activeTheme()->setType(Q3DTheme::ThemeEbony);
QFont font = m_graph->activeTheme()->font();
font.setPointSize(m_fontSize);
m_graph->activeTheme()->setFont(font);
m_graph->setShadowQuality(QAbstract3DGraph::ShadowQualitySoftLow);
m_graph->scene()->activeCamera()->setCameraPreset(Q3DCamera::CameraPresetFront);
None of these are required, but are used to override graph defaults. You can try how it looks with the preset defaults by commenting the block above out.
Finally we create a QScatterDataProxy and the associated QScatter3DSeries . We set custom label format and mesh smoothing for the series and add it to the graph:
QScatterDataProxy *proxy = new QScatterDataProxy;
QScatter3DSeries *series = new QScatter3DSeries(proxy);
series->setItemLabelFormat(QStringLiteral("@xTitle: @xLabel @yTitle: @yLabel @zTitle: @zLabel"));
series->setMeshSmooth(m_smooth);
m_graph->addSeries(series);
That concludes setting up the graph.
The last thing we do in the
ScatterDataModifier
constructor is to add data to the graph:
addData();
The actual data addition is done in
addData()
method. First we configure the axes:
m_graph->axisX()->setTitle("X");
m_graph->axisY()->setTitle("Y");
m_graph->axisZ()->setTitle("Z");
This could have been done in the constructor of
ScatterDataModifier
, but we added it here to keep the constructor simpler and the axes configuration near the data.
Next we create a data array:
QScatterDataArray *dataArray = new QScatterDataArray;
dataArray->resize(m_itemCount);
QScatterDataItem *ptrToDataArray = &dataArray->first();
and populate it:
float limit = qSqrt(m_itemCount) / 2.0f;
for (float i = -limit; i < limit; i++) {
    for (float j = -limit; j < limit; j++) {
        ptrToDataArray->setPosition(QVector3D(i + 0.5f,
                                              qCos(qDegreesToRadians((i * j) / m_curveDivider)),
                                              j + 0.5f));
        ptrToDataArray++;
    }
}
Finally we tell the proxy to start using the data we gave it:
m_graph->seriesList().at(0)->dataProxy()->resetArray(dataArray);
Now our graph has the data and is ready to be used. There isn't much interaction yet, though, so let's continue by adding some widgets to play with.
First, back in the application main, we'll create some widgets:
QComboBox *themeList = new QComboBox(widget);
themeList->addItem(QStringLiteral("Qt"));
themeList->addItem(QStringLiteral("Primary Colors"));
themeList->addItem(QStringLiteral("Digia"));
themeList->addItem(QStringLiteral("Stone Moss"));
themeList->addItem(QStringLiteral("Army Blue"));
themeList->addItem(QStringLiteral("Retro"));
themeList->addItem(QStringLiteral("Ebony"));
themeList->addItem(QStringLiteral("Isabelle"));
themeList->setCurrentIndex(6);
QPushButton *labelButton = new QPushButton(widget);
labelButton->setText(QStringLiteral("Change label style"));
QCheckBox *smoothCheckBox = new QCheckBox(widget);
smoothCheckBox->setText(QStringLiteral("Smooth dots"));
smoothCheckBox->setChecked(true);
QComboBox *itemStyleList = new QComboBox(widget);
itemStyleList->addItem(QStringLiteral("Sphere"), int(QAbstract3DSeries::MeshSphere));
itemStyleList->addItem(QStringLiteral("Cube"), int(QAbstract3DSeries::MeshCube));
itemStyleList->addItem(QStringLiteral("Minimal"), int(QAbstract3DSeries::MeshMinimal));
itemStyleList->addItem(QStringLiteral("Point"), int(QAbstract3DSeries::MeshPoint));
itemStyleList->setCurrentIndex(0);
QPushButton *cameraButton = new QPushButton(widget);
cameraButton->setText(QStringLiteral("Change camera preset"));
QPushButton *itemCountButton = new QPushButton(widget);
itemCountButton->setText(QStringLiteral("Toggle item count"));
QCheckBox *backgroundCheckBox = new QCheckBox(widget);
backgroundCheckBox->setText(QStringLiteral("Show background"));
backgroundCheckBox->setChecked(true);
QCheckBox *gridCheckBox = new QCheckBox(widget);
gridCheckBox->setText(QStringLiteral("Show grid"));
gridCheckBox->setChecked(true);
QComboBox *shadowQuality = new QComboBox(widget);
shadowQuality->addItem(QStringLiteral("None"));
shadowQuality->addItem(QStringLiteral("Low"));
shadowQuality->addItem(QStringLiteral("Medium"));
shadowQuality->addItem(QStringLiteral("High"));
shadowQuality->addItem(QStringLiteral("Low Soft"));
shadowQuality->addItem(QStringLiteral("Medium Soft"));
shadowQuality->addItem(QStringLiteral("High Soft"));
shadowQuality->setCurrentIndex(4);
QFontComboBox *fontList = new QFontComboBox(widget);
fontList->setCurrentFont(QFont("Arial"));
And add them to the vertical layout we created earlier:
vLayout->addWidget(labelButton, 0, Qt::AlignTop);
vLayout->addWidget(cameraButton, 0, Qt::AlignTop);
vLayout->addWidget(itemCountButton, 0, Qt::AlignTop);
vLayout->addWidget(backgroundCheckBox);
vLayout->addWidget(gridCheckBox);
vLayout->addWidget(smoothCheckBox, 0, Qt::AlignTop);
vLayout->addWidget(new QLabel(QStringLiteral("Change dot style")));
vLayout->addWidget(itemStyleList);
vLayout->addWidget(new QLabel(QStringLiteral("Change theme")));
vLayout->addWidget(themeList);
vLayout->addWidget(new QLabel(QStringLiteral("Adjust shadow quality")));
vLayout->addWidget(shadowQuality);
vLayout->addWidget(new QLabel(QStringLiteral("Change font")));
vLayout->addWidget(fontList, 1, Qt::AlignTop);
Now, let's connect them to methods in ScatterDataModifier:
QObject::connect(cameraButton, &QPushButton::clicked, modifier,
                 &ScatterDataModifier::changePresetCamera);
QObject::connect(labelButton, &QPushButton::clicked, modifier,
                 &ScatterDataModifier::changeLabelStyle);
QObject::connect(itemCountButton, &QPushButton::clicked, modifier,
                 &ScatterDataModifier::toggleItemCount);
QObject::connect(backgroundCheckBox, &QCheckBox::stateChanged, modifier,
                 &ScatterDataModifier::setBackgroundEnabled);
QObject::connect(gridCheckBox, &QCheckBox::stateChanged, modifier,
                 &ScatterDataModifier::setGridEnabled);
QObject::connect(smoothCheckBox, &QCheckBox::stateChanged, modifier,
                 &ScatterDataModifier::setSmoothDots);
QObject::connect(modifier, &ScatterDataModifier::backgroundEnabledChanged,
                 backgroundCheckBox, &QCheckBox::setChecked);
QObject::connect(modifier, &ScatterDataModifier::gridEnabledChanged,
                 gridCheckBox, &QCheckBox::setChecked);
QObject::connect(itemStyleList, SIGNAL(currentIndexChanged(int)), modifier,
                 SLOT(changeStyle(int)));
QObject::connect(themeList, SIGNAL(currentIndexChanged(int)), modifier,
                 SLOT(changeTheme(int)));
QObject::connect(shadowQuality, SIGNAL(currentIndexChanged(int)), modifier,
                 SLOT(changeShadowQuality(int)));
QObject::connect(modifier, &ScatterDataModifier::shadowQualityChanged, shadowQuality,
                 &QComboBox::setCurrentIndex);
QObject::connect(graph, &Q3DScatter::shadowQualityChanged, modifier,
                 &ScatterDataModifier::shadowQualityUpdatedByVisual);
QObject::connect(fontList, &QFontComboBox::currentFontChanged, modifier,
                 &ScatterDataModifier::changeFont);
QObject::connect(modifier, &ScatterDataModifier::fontChanged, fontList,
                 &QFontComboBox::setCurrentFont);
Here are the methods in ScatterDataModifier the signals were connected to:
void ScatterDataModifier::changeStyle(int style)
{
    QComboBox *comboBox = qobject_cast<QComboBox *>(sender());
    if (comboBox) {
        m_style = QAbstract3DSeries::Mesh(comboBox->itemData(style).toInt());
        if (m_graph->seriesList().size())
            m_graph->seriesList().at(0)->setMesh(m_style);
    }
}
void ScatterDataModifier::setSmoothDots(int smooth)
{
    m_smooth = bool(smooth);
    QScatter3DSeries *series = m_graph->seriesList().at(0);
    series->setMeshSmooth(m_smooth);
}
void ScatterDataModifier::changeTheme(int theme)
{
    Q3DTheme *currentTheme = m_graph->activeTheme();
    currentTheme->setType(Q3DTheme::Theme(theme));
    emit backgroundEnabledChanged(currentTheme->isBackgroundEnabled());
    emit gridEnabledChanged(currentTheme->isGridEnabled());
    emit fontChanged(currentTheme->font());
}
void ScatterDataModifier::changePresetCamera()
{
    static int preset = Q3DCamera::CameraPresetFrontLow;
    m_graph->scene()->activeCamera()->setCameraPreset((Q3DCamera::CameraPreset)preset);
    if (++preset > Q3DCamera::CameraPresetDirectlyBelow)
        preset = Q3DCamera::CameraPresetFrontLow;
}
void ScatterDataModifier::changeLabelStyle()
{
    m_graph->activeTheme()->setLabelBackgroundEnabled(!m_graph->activeTheme()->isLabelBackgroundEnabled());
}
void ScatterDataModifier::changeFont(const QFont &font)
{
    QFont newFont = font;
    newFont.setPointSizeF(m_fontSize);
    m_graph->activeTheme()->setFont(newFont);
}
void ScatterDataModifier::shadowQualityUpdatedByVisual(QAbstract3DGraph::ShadowQuality sq)
{
    int quality = int(sq);
    emit shadowQualityChanged(quality); // connected to a checkbox in main.cpp
}
void ScatterDataModifier::changeShadowQuality(int quality)
{
    QAbstract3DGraph::ShadowQuality sq = QAbstract3DGraph::ShadowQuality(quality);
    m_graph->setShadowQuality(sq);
}
void ScatterDataModifier::setBackgroundEnabled(int enabled)
{
    m_graph->activeTheme()->setBackgroundEnabled((bool)enabled);
}
void ScatterDataModifier::setGridEnabled(int enabled)
{
    m_graph->activeTheme()->setGridEnabled((bool)enabled);
}
And so we have an application in which we can control:
文件: